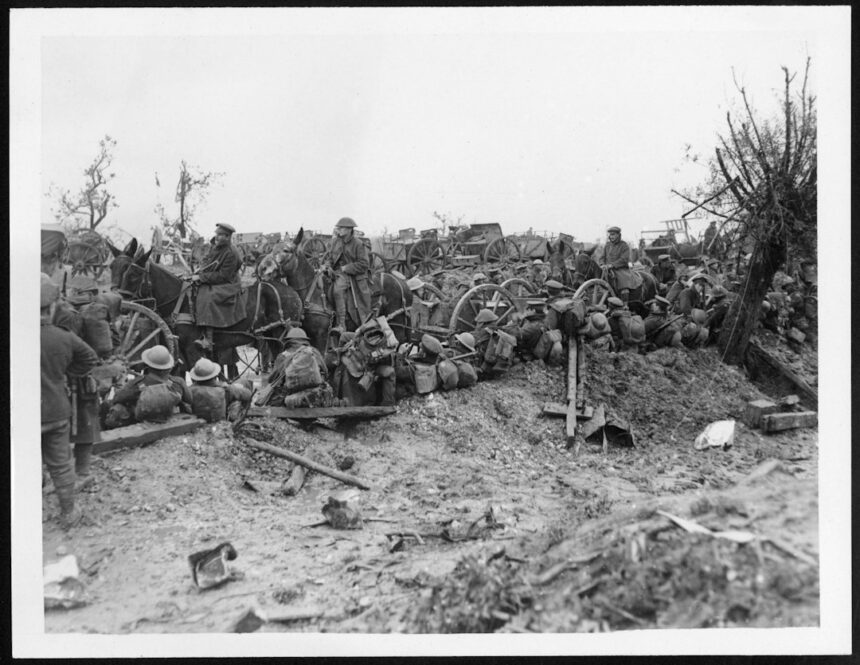
The Battle of the Bulge, a desperate and ultimately futile German offensive launched in December 1944, was characterized by a complex and, at times, fractured command structure on both sides. Understanding how the Allied and German armies were organized, led, and directed is crucial to appreciating the strategic decisions, operational blunders, and tactical engagements that defined this pivotal winter battle. The success and failures witnessed on the frozen Ardennes front were intrinsically linked to the efficacy of their respective command hierarchies.
The audacious German plan, codenamed Wacht am Rhein (Watch on the Rhine), was conceived and driven by Adolf Hitler himself. His vision was to split the Allied forces, recapture the port of Antwerp, and force a negotiated peace on the Western Front. The execution of this ambitious undertaking rested on a relatively convoluted and centrally controlled German command structure, one that, while capable of decisive action under optimal conditions, proved inflexible and prone to delays when faced with unforeseen circumstances.
The Oberkommando der Wehrmacht (OKW) and Hitler’s Directives
At the apex of the German command structure was the Oberkommando der Wehrmacht (OKW), the High Command of the Armed Forces. This body, increasingly dominated by Hitler’s direct involvement in military planning, was responsible for the overall strategic direction of the war. For Wacht am Rhein, Hitler personally approved the concept and dictated many of the operational details, demonstrating his tenacious grip on military affairs, even at the operational level.
Hitler’s Role in Strategic Conception
Hitler’s singular obsession with offensive action, coupled with his deep-seated distrust of his generals, meant that he often bypassed traditional military channels and imposed his will directly. He envisioned a lightning thrust through the Ardennes, a sector considered by the Allies to be quiet and therefore lightly defended. His faith in the element of surprise and the perceived weakness of American forces was a significant driver of the offensive’s inception. However, this centralized control also meant that decisions could be slow to be made, and once made, were often unalterable, even in the face of evolving battlefield realities.
The Influence of Jodl and Keitel
Generals Alfred Jodl, Chief of the Operations Staff of the OKW, and Wilhelm Keitel, Chief of the OKW, acted as Hitler’s principal military advisors and conduits for his directives. While they were responsible for translating Hitler’s grand strategy into actionable plans, their effectiveness was often hampered by their sycophantic adherence to the Führer’s wishes, even when those wishes conflicted with sound military judgment. Their role in Wacht am Rhein was to implement Hitler’s vision, often with limited room for independent tactical adaptation.
Army Group B: The Spearhead of the Offensive
The primary responsibility for executing Wacht am Rhein fell to Army Group B, commanded by Field Marshal Günther von Kluge, and later, Field Marshal Walter Model. This army group was tasked with the monumental challenge of breaching the Allied lines and achieving the ambitious objectives set by OKW.
Field Marshal Günther von Kluge’s Command
Kluge, an experienced commander, inherited the burden of leading the offensive. However, his command was complicated by internal tensions and a lack of complete confidence in the feasibility of the plan. He was aware of the significant risks involved and the strained resources of the German war effort. His initial reluctance and subsequent attempts to rein in the offensive’s pace once it began highlight the challenges of commanding an operation dictated from above with limited flexibility.
Field Marshal Walter Model’s Tenure
Following Kluge’s dismissal, Field Marshal Walter Model took command of Army Group B. Model was a renowned defensive tactician, known for his ability to salvage desperate situations and inflict heavy casualties on the enemy. His focus shifted to stemming the tide of the Allied counteroffensive and preventing a complete collapse of the German front. While he proved adept at defensive operations, the offensive phase of Wacht am Rhein had already lost critical momentum by the time he assumed control.
The Armies Within the Army Group: Strength and Weaknesses
Within Army Group B, the offensive was spearheaded by the 5th Panzer Army and the 6th Panzer Army, supported by the 7th Army. These formations were augmented with elite Panzer divisions, SS Panzer divisions, and Volksgrenadier divisions, all intended to deliver the decisive blow.
The 6th Panzer Army: A Powerful but Overstretched Force
Led by SS-Oberstgruppenführer Sepp Dietrich, the 6th Panzer Army was a formidable fighting force. However, it was also heavily reliant on speed and surprise. Their advance was hampered by logistical challenges, fuel shortages, and the unexpected tenacity of American defenses in certain sectors. Dietrich, a loyal but not always militarily astute commander, often struggled to maintain cohesion and direction amidst the chaos of the rapid advance.
The 5th Panzer Army: Facing Stronger Resistance
Under the command of General Hasso von Manteuffel, the 5th Panzer Army faced some of the most determined American resistance. Manteuffel was a highly capable commander, but even his strategic acumen and the skill of his troops were tested by the heavily fortified positions and the increasingly effective Allied air power, which began to reassert itself as the weather improved.
The 7th Army: Providing Support and Securing the Flanks
The 7th Army, commanded by General Erich Brandenberger, played a crucial role in supporting the panzer thrusts and protecting the flanks of the offensive. While it did not possess the same offensive punch as the panzer armies, its infantry formations were vital for holding ground and absorbing enemy counterattacks.
The command structure during the Battle of the Bulge played a crucial role in the outcome of this significant World War II conflict. Understanding the hierarchy and decision-making processes can provide valuable insights into the strategies employed by both the Allied and Axis forces. For a more in-depth analysis of the command structure and its implications, you can read a related article on this topic at In the War Room.
The Allied Response: A Divided Command Structure
The Allied command structure in December 1944, while generally more integrated than the German system, was not without its complexities and initial weaknesses, particularly in the Ardennes sector. The vastness of the Allied front and the presence of different nationalities meant that coordination was a constant challenge.
Supreme Headquarters Allied Expeditionary Force (SHAEF)
At the highest level, the Supreme Headquarters Allied Expeditionary Force (SHAEF), commanded by General Dwight D. Eisenhower, was responsible for the overall direction of Allied operations in Northwest Europe. Eisenhower’s leadership was characterized by his pragmatism and his ability to foster cooperation among diverse Allied commanders.
General Dwight D. Eisenhower’s Strategic Vision
Eisenhower’s primary objective was the defeat of Germany. He had a clear understanding of the war’s broad strategic aims and was adept at delegating authority to his subordinate commanders. His decision to concentrate his forces on the northern sector of the Western Front, which ultimately proved prescient in countering the German offensive, showcased his strategic foresight.
The Role of General Walter Bedell Smith
General Walter Bedell Smith, Eisenhower’s Chief of Staff, played a crucial role in managing SHAEF’s operations and translating strategic directives into practical plans. His efficiency and organizational skills were vital in coordinating the complex Allied war machine.
The Field Commands: Army Group and Army Levels
Beneath SHAEF, the Allied forces were organized into Army Groups, which in turn comprised several Armies. The Ardennes sector was primarily the responsibility of the First U.S. Army and the Ninth U.S. Army, both part of Army Group B, commanded by Field Marshal Sir Bernard Montgomery.
Field Marshal Sir Bernard Montgomery’s Command
Montgomery, a highly respected British commander, commanded Army Group B, which included the American First and Ninth Armies. His initial response to the offensive was somewhat detached, leading to friction with some American commanders. However, once the gravity of the situation became clear, his tactical acumen and organizational abilities were instrumental in stabilizing the front and launching counterattacks.
Montgomery’s Initial Misjudgment and Subsequent Action
Montgomery’s initial assessment of the German attack as a localized nuisance rather than a major offensive led to a delay in deploying the full might of his reserves. This, coupled with his tendency to centralize control under his direct command during the crisis, drew criticism. However, his subsequent decisive leadership in coordinating the Allied counteroffensive, particularly the relief of Bastogne, was undeniable.
Lieutenant General Omar N. Bradley’s First U.S. Army
Lieutenant General Omar N. Bradley, commanding the First U.S. Army, bore the brunt of the initial German onslaught. His forces were spread thin and caught by surprise. Bradley’s calm and resolute leadership under extreme pressure was a significant factor in the American ability to mount a defense and eventually launch a counterattack.
The American Defenders’ Resilience
The soldiers of the First U.S. Army, though initially surprised and overwhelmed, displayed remarkable resilience and courage. Their determined defense, particularly at key crossroads like Bastogne, disrupted the German timetable and inflicted significant casualties, ultimately contributing to the failure of the offensive.
Lieutenant General William H. Simpson’s Ninth U.S. Army
Lieutenant General William H. Simpson’s Ninth U.S. Army, positioned to the north of the First Army, was initially less directly involved in the main thrust of the German offensive. However, as the battle developed, it played a crucial role in containing the German advance and preventing the offensive from achieving its deeper objectives.
The Impact of Allied Command Reorganization
The initial shock of the German offensive forced a swift and significant reorganization of the Allied command structure. Eisenhower’s decision to place Montgomery in overall command of all Allied forces north of the German penetration was a bold but necessary move to unify the response.
Eisenhower’s Decision to Centralize Command Under Montgomery
This decision, though controversial among some American commanders who felt their independence was being curtailed, was a pragmatic recognition of the need for unified control in a rapidly evolving crisis. Montgomery, with his extensive experience in large-scale operations, was deemed the best individual to coordinate the disparate Allied units.
The Reorganization of Front Lines and Responsibilities
The reorganization involved shifting divisions, reassigning objectives, and establishing clear lines of communication and command. This fluid adaptation of the Allied command structure, while disruptive in the short term, ultimately proved crucial in stemming the German advance and launching a successful counteroffensive.
The Role of Key Commanders and Their Impact

The Battle of the Bulge was not solely a product of grand strategic plans and organizational charts; it was shaped by the decisions and actions of individual commanders at various levels. The successes and failures of these leaders profoundly influenced the course of the battle.
German Commanders: Strengths and Fatal Flaws
While many German commanders were highly skilled, the overarching command structure, heavily influenced by Hitler, often stifled their initiative and adaptability.
Field Marshal Erich von Manstein’s Strategic Input
Field Marshal Erich von Manstein, often considered the most brilliant German general of World War II, was a key proponent of the Ardennes offensive. His strategic vision provided the theoretical framework for Wacht am Rhein. However, his role was primarily advisory, and he was not given direct command of the operational forces.
General Hasso von Manteuffel: A Capable but Limited Commander
As mentioned, General Manteuffel of the 5th Panzer Army was a highly competent commander. He understood the importance of speed and maneuver, but his efforts were constrained by the logistical realities and the stiffening Allied resistance.
SS-Oberstgruppenführer Sepp Dietrich: Loyalty Over Military Acumen
Dietrich, a close confidant of Hitler and a charismatic SS leader, commanded the 6th Panzer Army. While fiercely loyal and brave, his military judgment was often questionable, and his decision-making could be impulsive, further exacerbating the logistical challenges faced by his army.
Allied Commanders: Resilience and Adaptability
The Allied command, despite its initial surprise, demonstrated remarkable resilience and adaptability, largely due to the competence of its senior leaders.
Lieutenant General George S. Patton Jr.: The Master of Maneuver
Lieutenant General George S. Patton Jr., commander of the Third U.S. Army, was instrumental in the Allied counteroffensive. His rapid redeployment of his forces to relieve the besieged defenders of Bastogne is a classic example of brilliant maneuver warfare and decisive leadership. His famous quote, “No bastard ever won a war by dying for his country. He won it by making the other poor dumb bastard die for his country,” perfectly encapsulates his aggressive and effective command style.
Patton’s Rapid Redeployment and the Relief of Bastogne
Patton’s ability to quickly turn his army around, march north through challenging terrain and weather, and launch a swift attack to relieve Bastogne showcased his unparalleled operational skill and the loyalty his troops had to him. This single act significantly boosted Allied morale and blunted the German offensive.
Brigadier General Anthony McAuliffe: Courage Under Fire
Brigadier General Anthony McAuliffe, commanding the 101st Airborne Division, became a symbol of American defiance during the defense of Bastogne. His legendary response of “Nuts!” to the German demand for surrender epitomized the fighting spirit of his beleaguered troops and served as a powerful morale booster for the entire Allied effort.
The Impact of Communication and Coordination
Effective communication and coordination were critical for both sides. The Germans, relying on centralized command, struggled with maintaining clear lines of communication during their rapid advance. The Allies, while facing initial coordination challenges due to the surprise attack and the presence of multiple nationalities, ultimately benefited from a more robust communication network and a greater degree of inter-service cooperation.
Challenges and Innovations in Command and Control

The Battle of the Bulge highlighted significant challenges in command and control for both the Allies and the Germans, prompting adaptations and innovations that would shape future military operations.
German Command and Control Issues
The German command structure, deeply rooted in hierarchical obedience and Hitler’s micromanagement, proved to be a significant impediment to their offensive.
Centralized Decision-Making and its Drawbacks
Hitler’s insistence on approving every significant operational detail meant that decisions were often delayed, and once made, were rarely reconsidered, even when circumstances changed. This rigidity prevented commanders on the ground from adapting to the fluid battlefield.
Logistical Nightmares and Communication Breakdowns
The rapid advance of the panzer divisions stretched their supply lines to the breaking point. Fuel shortages, lack of ammunition, and damaged infrastructure severely hampered their ability to sustain the offensive. Furthermore, radio communication was often unreliable due to jamming, interdiction, and the sheer distances involved.
Inadequate Reconnaissance and Intelligence Gathering
A critical failure in German command was the underestimation of Allied strength and disposition in the Ardennes. Poor reconnaissance and flawed intelligence led them to believe the sector was lightly held, a miscalculation that proved disastrous.
Allied Command and Control Strengths
The Allied command, while initially caught off guard, demonstrated remarkable resilience and adaptability, leveraging its strengths to overcome the German offensive.
Eisenhower’s Flexible Command Philosophy
Eisenhower’s belief in delegating authority to competent commanders, while maintaining strategic oversight, allowed for more agile responses to the crisis. His willingness to make difficult decisions, such as temporarily placing Montgomery in overall command, demonstrated his pragmatism.
Robust Communication Networks and Inter-Service Cooperation
The Allies possessed superior communication technology, including a more reliable radio network and air-ground coordination capabilities. This facilitated faster dissemination of orders and better synchronization of operations between different branches of the military.
The Power of Air Superiority (Once Weather Permitted)
While initial weather conditions grounded Allied aircraft, the eventual improvement allowed for the decisive use of air power. This significantly impacted German logistics, troop movements, and morale, highlighting the importance of integrated air-ground command and control.
Innovations in Tactical Command
The fierce fighting in the Ardennes also spurred innovations in tactical command, with small units demonstrating remarkable initiative and adaptability in the face of overwhelming odds. The importance of experienced NCOs and junior officers in maintaining cohesion and executing orders under fire became acutely apparent.
The command structure during the Battle of the Bulge played a crucial role in the effectiveness of the Allied and German forces. Understanding how leadership decisions impacted the course of the battle can provide valuable insights into military strategy. For a deeper exploration of this topic, you can read a related article that discusses the intricacies of command dynamics in this pivotal conflict. To learn more, visit this insightful resource.
The Legacy of Command in the Battle of the Bulge
| Command | Commander | Rank | Role | Forces Commanded |
|---|---|---|---|---|
| Allied Forces | General Dwight D. Eisenhower | General | Supreme Allied Commander, European Theater | All Allied ground, air, and naval forces in Europe |
| 12th Army Group | General Omar Bradley | General | Commanded U.S. First and Third Armies | Approximately 1 million troops |
| First Army | General Courtney Hodges | General | Primary U.S. Army in Ardennes region | ~250,000 troops |
| Third Army | General George S. Patton | General | Rapid response and counterattack force | ~250,000 troops |
| German Forces | Field Marshal Gerd von Rundstedt | Field Marshal | Commander West, overall German forces in the West | ~200,000 troops |
| Army Group B | Field Marshal Walter Model | Field Marshal | Direct command of forces in Ardennes offensive | ~200,000 troops |
| 5th Panzer Army | General Hasso von Manteuffel | General | Main armored striking force in the offensive | ~30,000 troops |
| 6th Panzer Army | SS-Oberstgruppenführer Sepp Dietrich | SS-Oberstgruppenführer | Second armored force in the offensive | ~30,000 troops |
The Battle of the Bulge left an indelible mark on the history of warfare, not only for its ferocity but also for the lessons it imparted about the critical role of effective command and control.
Lessons Learned for German Military Doctrine
The failure of Wacht am Rhein underscored the limitations of a rigid, centralized command structure heavily influenced by political ideology rather than military pragmatism. The overreliance on Hitler’s personal will proved to be a fatal flaw, ultimately contributing to the collapse of the German war effort on the Western Front.
The Inflexibility of Nazi Military Leadership
The Nazi regime’s insistence on absolute obedience and the suppression of dissenting opinions among military leaders meant that critical mistakes were rarely corrected. The battle served as a stark illustration of how ideological purity could be detrimental to military effectiveness.
The Exhaustion of German Resources
The offensive, born out of desperation, ultimately depleted Germany’s remaining offensive capabilities. The command structure, while capable of launching such a daring gamble, failed to adapt when the gamble didn’t pay off, leading to further unsustainable losses.
Lessons Learned for Allied Military Doctrine
For the Allies, the Battle of the Bulge served as a harsh but valuable lesson in preparedness, intelligence, and the importance of integrated command. It reinforced the strengths of their more decentralized, but ultimately more flexible, command system.
The Importance of Unified Allied Command
Eisenhower’s decision to temporarily centralize command under Montgomery, while controversial, demonstrated the necessity of unified leadership during a major crisis. This experience further refined the Allied approach to inter-service and international cooperation.
The Value of Decentralized Initiative
The resilience of the American defenders, often acting with initiative at the tactical level, highlighted the importance of empowering subordinate commanders and NCOs. This fostered a spirit of independent action and rapid adaptation that proved crucial.
The Evolution of Combined Arms Warfare
The battle emphasized the critical need for effective coordination between ground forces and air power. The ability of the Allies to deploy their air assets once the weather cleared proved decisive, showcasing the evolving nature of combined arms warfare.
The Enduring Significance of Leadership in Crisis
Ultimately, the Battle of the Bulge stands as a testament to the profound impact of leadership, both good and bad. The determined resistance of Allied soldiers, led by resolute commanders, ultimately thwarted Hitler’s last great gamble. The battle serves as a historical case study, illustrating how the effectiveness of a command structure, the decisiveness of its leaders, and the adaptability of its forces can determine the fate of armies and the outcome of wars. The lessons learned in the frozen forests of the Ardennes continue to inform military thinking and the study of command and control to this day.
Eisenhower Gave Montgomery 2 U.S. Armies—Then He Wanted More
FAQs
What was the command structure during the Battle of the Bulge?
The command structure during the Battle of the Bulge consisted of the Allied forces led by General Dwight D. Eisenhower, the Supreme Commander of the Allied Expeditionary Force, and General Omar Bradley, who commanded the 12th Army Group.
Who was in charge of the German forces during the Battle of the Bulge?
The German forces during the Battle of the Bulge were led by Field Marshal Gerd von Rundstedt, who was the overall commander of the German Army Group B, and Colonel General Hasso von Manteuffel, who commanded the 5th Panzer Army.
How did the command structure impact the outcome of the Battle of the Bulge?
The command structure played a crucial role in the outcome of the Battle of the Bulge. General Eisenhower’s strategic decisions and General Bradley’s tactical leadership were instrumental in coordinating the Allied response to the German offensive, ultimately leading to the successful defense and eventual counterattack.
Were there any challenges within the command structure during the Battle of the Bulge?
One of the main challenges within the command structure during the Battle of the Bulge was the rapid and unexpected nature of the German offensive, which caught the Allies off guard. This led to initial confusion and communication issues, but the Allied commanders were able to quickly adapt and respond effectively.
Did the command structure evolve during the Battle of the Bulge?
Yes, the command structure evolved during the Battle of the Bulge as Allied forces reorganized and reinforced their positions to counter the German offensive. General Patton’s Third Army played a crucial role in relieving the besieged town of Bastogne, showcasing the flexibility and adaptability of the Allied command structure.