The shores of Normandy stand as a silent testament to a pivotal moment in human history, the D-Day invasion, codenamed Operation Overlord. On June 6, 1944, an Allied force, the largest seaborne invasion in history, launched its audacious assault on Nazi-occupied France. This meticulously planned and executed operation marked the beginning of the end for Hitler’s Third Reich, a turning point that would irrevocably alter the course of World War II and shape the geopolitical landscape for decades to come. The success of D-Day was not a matter of chance; it was the culmination of years of strategic planning, intense logistical preparation, and the extraordinary bravery of hundreds of thousands of soldiers, sailors, and airmen. This analysis will delve into the intricate details of the Normandy raid, exploring the strategic imperatives, the operational complexities, the multifaceted challenges faced, and the profound, enduring legacy of this monumental undertaking.
The Genesis of Operation Overlord
The strategic decision to launch a full-scale invasion of Western Europe had been a long-standing objective for the Allied powers, particularly after the fall of France in 1940. The need to liberate Europe from Nazi tyranny and defeat Germany on its Western Front was paramount. However, the immense logistical and military hurdles presented a daunting prospect. The initial discussions and planning for a cross-channel invasion began in earnest in 1943, driven by the urgency to relieve pressure on the Eastern Front, where the Soviet Union was bearing the brunt of the German war machine.
Strategic Imperatives and Allied Coordination
The overarching strategic imperative was to open a second major front against Germany in Western Europe. This would force Hitler to divert crucial resources and manpower away from the Eastern Front, thereby easing the pressure on the Soviets and potentially hastening the war’s end. The establishment of a foothold in France was seen as the only viable pathway to advancing into Germany and ultimately achieving unconditional surrender. The coordination between the Allied powers, primarily Great Britain, the United States, and Canada, was a monumental diplomatic and military feat in itself. Divergent national interests, military doctrines, and resource allocations had to be reconciled under a unified command structure. General Dwight D. Eisenhower, Supreme Commander of the Allied Expeditionary Force (SHAEF), played a crucial role in bridging these differences and fostering a cohesive operational plan. His leadership was instrumental in navigating the complex political and military landscape, ensuring that the vast array of resources and personnel were marshaled effectively towards a common goal. The planning process involved extensive intelligence gathering, resource allocation debates, and the development of intricate operational blueprints.
The Intelligence War and Deception Operations
Crucial to the success of Overlord was the sophisticated intelligence war waged by the Allies. For months leading up to the invasion, a massive deception campaign, codenamed Operation Bodyguard, was meticulously executed. This elaborate ruse aimed to mislead the Germans about the true landing sites and the timing of the invasion. The Allies fabricated entire phantom armies, complete with inflatable tanks, dummy landing craft, and fake radio transmissions, to convince the Germans that the invasion would occur at the Pas-de-Calais, the narrowest point of the English Channel, rather than the Normandy coast. This strategic deception played a vital role in drawing German reserves away from Normandy, significantly reducing the initial resistance the Allied forces would encounter. Allied intelligence also meticulously gathered information on German defenses, troop dispositions, and morale. This intelligence was invaluable in selecting the landing beaches, planning the airborne assaults, and predicting enemy responses. The effectiveness of this intelligence and deception campaign cannot be overstated; it was a critical factor in the initial success of the invasion.
For those interested in a comprehensive exploration of historical raids, a detailed analysis can be found in the article available at this link. The article delves into various significant raids throughout history, examining their strategic implications and the impact they had on subsequent military tactics. This insightful resource is perfect for historians and military enthusiasts alike, providing a deeper understanding of the complexities involved in these daring operations.
The Amphibious Assault: Beaches and Airborne Drops
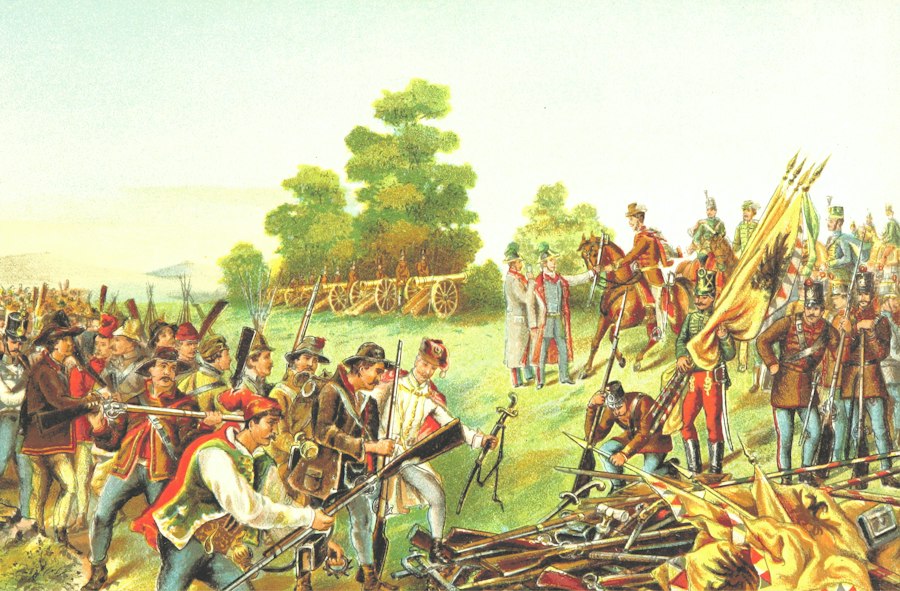
The D-Day invasion was a multi-pronged assault, comprising both a massive amphibious landing on the beaches of Normandy and a crucial airborne operation designed to secure key objectives inland. The selection of the Normandy coast was a strategic compromise, offering a balance between proximity to England, the availability of suitable landing beaches, and the possibility of exploiting terrain inland. The beaches were codenamed, each with its distinct characteristics and defensive fortifications.
The Five Landing Beaches: A Detailed Overview
The Allied landing forces were divided into five assault beaches, stretching over a sixty-mile front. From west to east, these were:
- Utah Beach: Assigned to the U.S. VII Corps, Utah was chosen for its relative lack of obstacles and the potential for rapid exploitation inland towards Cherbourg. The American forces faced lighter resistance here than on other beaches, partly due to a crucial navigation error by the landing craft that placed them further south than intended, into a less heavily defended sector. Despite encountering some resistance, the assault on Utah was considered the most successful of the day in terms of casualties and speed of advance.
- Omaha Beach: This beach, also assigned to the U.S. VII Corps, proved to be the bloodiest engagement of D-Day. Defended by experienced German troops from the 352nd Infantry Division, Omaha was characterized by steep bluffs that offered excellent defensive positions for the Germans. The Allied forces, primarily American, faced relentless machine-gun fire, artillery barrages, and mortar attacks from the heavily fortified bluffs overlooking the beach. The assault bogged down considerably, with troops struggling to gain a foothold against the determined German defense. Intense fighting, characterized by small unit actions and individual acts of heroism, eventually allowed some forces to push inland, but at a horrific cost.
- Gold Beach: British forces of the XXX Corps landed on Gold Beach. They faced a well-organized German defense, including extensive minefields and concrete fortifications. However, the British troops were better prepared and equipped for this type of assault than their American counterparts on Omaha. They utilized specialized armor, such as the “Hobart’s Funnies,” which included tanks equipped with flails to clear mines and flamethrowers, to overcome obstacles. Gold Beach was secured with relatively fewer casualties than Omaha, and the British forces were able to link up with Canadian forces on their left flank.
- Juno Beach: Canadian forces, specifically the 3rd Canadian Infantry Division, assaulted Juno Beach. Similar to Gold, Juno was defended by strong German positions, including artillery emplacements and anti-tank ditches. The Canadians encountered fierce resistance, particularly from the 716th Infantry Division. Despite heavy initial casualties, the Canadian troops displayed remarkable resilience and adaptability, pushing inland and capturing key objectives. Their success in penetrating the German defenses was crucial in establishing a solid front along the invasion beaches.
- Sword Beach: The easternmost beach, Sword, was assigned to the British 3rd Infantry Division. This sector was defended by elements of the German 716th Infantry Division. While the initial landings were relatively successful, the advance inland was met with determined German counterattacks, notably by elements of the 21st Panzer Division. The British forces managed to secure their beachhead and push inland, but their progress was significantly hampered by these counterattacks, which prevented them from linking up with the airborne divisions as planned on D-Day itself.
The Airborne Prelude: Securing Key Objectives
Prior to the amphibious landings, thousands of Allied paratroopers from the U.S. 82nd and 101st Airborne Divisions and the British 6th Airborne Division were dropped behind enemy lines. Their mission was critical: to seize key bridges, neutralize coastal artillery batteries, and disrupt German communications and reinforcements. The airborne drops were fraught with peril. Many paratroopers were scattered off course due to strong winds and inaccurate drop zones, leading to confusion and isolated engagements. However, despite the disorganization, many units managed to achieve their objectives. The British 6th Airborne successfully captured Pegasus Bridge, preventing German armor from reinforcing the coastal defenses. The American airborne divisions fought fiercely to secure causeways and destroy enemy artillery. The airborne operations, while costly, played a vital role in paving the way for the success of the amphibious landings by creating a crucial element of surprise and disarray within the German defensive network.
Navigating the Gauntlet: Challenges and German Defenses

The Allied forces faced a formidable array of German defenses, meticulously constructed along the Atlantic Wall, a vast system of fortifications designed to repel any Allied invasion. These defenses, combined with the inherent dangers of amphibious warfare, presented a daunting challenge to the invading troops. The Germans, though often outmaneuvered by Allied deception, possessed significant defensive capabilities.
The Atlantic Wall: A formidable Barrier
The Atlantic Wall was not a continuous, impenetrable barrier, but rather a series of strongpoints, bunkers, minefields, and anti-tank obstacles spread across the coastline. Along the chosen landing beaches, the Germans had emplaced:
- Machine-gun nests and concrete bunkers: These provided devastating interlocking fields of fire, making beach approaches incredibly hazardous.
- Artillery batteries: Positioned on higher ground, these batteries could bombard landing craft and troops attempting to cross the beaches.
- Minefields: Extensive networks of anti-personnel and anti-tank mines were laid on beaches and inland, posing a constant threat.
- Anti-tank obstacles: “Czech hedgehogs,” “dragon’s teeth,” and submerged obstacles were designed to impede the progress of landing craft and tanks.
- Flooded areas: In some sectors, the Germans had deliberately flooded low-lying areas to restrict landing options and funnel Allied forces into kill zones.
The quality and disposition of German forces varied. While some sectors were defended by seasoned Waffen-SS troops, others were manned by older conscripts or forced laborers who were less motivated and experienced. Nevertheless, the sheer density of the defenses, particularly on Omaha and Juno, presented a severe test of the Allied infantry’s resolve and battlefield ingenuity.
The German Response and Critical Miscalculations
The German command structure and their response to the invasion were hampered by several critical miscalculations. Field Marshal Erwin Rommel, tasked with strengthening the Atlantic Wall, had advocated for a more aggressive defensive posture, believing an invasion was imminent and needed to be repulsed on the beaches. However, the German Supreme Command remained divided on the exact location and timing of the invasion. Hitler himself was famously absent from his headquarters when the invasion began, delaying crucial decisions about committing the strategic Panzer reserves. Furthermore, the Allied deception operations were highly effective in drawing German attention to the Pas-de-Calais, leading to a delayed and piecemeal response in Normandy. The German response, when it came, was often uncoordinated and insufficient to stem the Allied tide. Their failure to adequately reinforce the Normandy defenses and their inability to effectively deploy their mobile reserves in the critical early hours of the invasion proved to be a fatal strategic blunder.
The Grim Reality of Combat and the Price of Freedom
The D-Day landings were not a clean, surgical operation; they were a brutal, chaotic, and bloody affair. The soldiers who stormed the beaches faced unimaginable horrors, demonstrating extraordinary courage in the face of overwhelming odds. The personal experiences of these men, etched in their memories and documented in countless accounts, paint a stark picture of the realities of modern warfare.
The Human Cost: Sacrifices and Heroism
The immediate aftermath of the D-Day landings was marked by immense casualties. Omaha Beach, in particular, witnessed scenes of carnage that would forever be seared into the collective memory of the Allied forces. Young men, many barely out of their teens, were mowed down by machine-gun fire, blown apart by artillery, and drowned in the churning waters. The sheer scale of the loss was staggering, and the emotional toll on the survivors was profound. Yet, amidst the carnage, acts of incredible heroism were commonplace. Soldiers pushed forward against impossible odds, braved enemy fire to rescue wounded comrades, and displayed unwavering determination to secure their objectives. The bravery of the individual soldier, often acting with little direct supervision in the chaos of battle, was the bedrock upon which the Allied victory was built. The stories of Sergeant Frank Peregory, who single-handedly cleared a German strongpoint on Omaha Beach, or Lieutenant Colonel Robert G. Cole, who led a daring bayonet charge on a German position, exemplify the extraordinary courage displayed on that day. The sacrifices made by these men were immense, and the price of freedom was paid in blood.
The Logistics of Liberation: Sustaining the Push Inland
Beyond the initial assault, the success of Operation Overlord hinged on the ability of the Allies to sustain their presence and push inland. This required an unprecedented logistical undertaking. The beaches had to be cleared of obstacles, temporary harbors (Mulberry Harbours) had to be constructed, and a constant stream of supplies – ammunition, food, medical supplies, and reinforcements – had to be ferried across the English Channel. The vulnerability of the landing beaches to weather and enemy attack made this an incredibly challenging task. The Allies had to build infrastructure on the fly, often under direct enemy fire. The rapid exploitation of the beachheads was crucial to prevent the Germans from consolidating their defenses. The development of artificial harbors, designed to facilitate the rapid unloading of supplies, was a testament to Allied ingenuity. The logistical triumph of D-Day, the ability to maintain a continuous flow of men and materiel, was as critical to the ultimate success of the invasion as the courage of the fighting troops.
For those interested in a comprehensive examination of historical raids, a related article can be found at In the War Room, which delves into the strategic implications and outcomes of various military operations throughout history. This analysis not only highlights the tactics employed but also provides insight into the broader context of each raid, making it a valuable resource for anyone looking to deepen their understanding of military history.
The Enduring Legacy of D-Day
| Raid Name | Date | Location | Number of Participants | Duration (hours) | Casualties | Outcome | Primary Objective |
|---|---|---|---|---|---|---|---|
| Operation Market Garden | September 17-25, 1944 | Netherlands | 35,000 | 9 | 1,654 Allied casualties | Partial Success | Seize bridges to advance into Germany |
| Raid on Entebbe | July 4, 1976 | Entebbe, Uganda | 100 | 1.5 | 3 Israeli casualties | Success | Rescue hostages from hijacked plane |
| St. Nazaire Raid | March 28, 1942 | St. Nazaire, France | 611 | 5 | 169 Allied casualties | Success | Destroy dry dock to prevent German use |
| Operation Chariot | March 28, 1942 | St. Nazaire, France | 611 | 5 | 169 Allied casualties | Success | Destroy dry dock to prevent German use |
| Dieppe Raid | August 19, 1942 | Dieppe, France | 6,000 | 8 | 3,623 Allied casualties | Failure | Test feasibility of amphibious assault |
The D-Day invasion was more than just a single military operation; it was a watershed moment that had profound and lasting consequences for the world. Its success fundamentally altered the trajectory of World War II and shaped the post-war geopolitical order. The sacrifices made on the beaches of Normandy continue to resonate, serving as a powerful reminder of the costs and complexities of warfare.
The Turning of the Tide: Defeat of Nazi Germany
Operation Overlord marked the beginning of the end for Nazi Germany. By establishing a firm foothold in Western Europe, the Allies were able to systematically advance into France, liberating Paris and pushing towards the German heartland. The opening of the Western Front forced Germany to fight a two-front war, stretching its resources to breaking point. The relentless pressure from the East and the West ultimately led to Germany’s unconditional surrender in May 1945. D-Day was the crucial step that made this victory possible, shifting the strategic initiative decisively into Allied hands and signaling the imminent collapse of the Nazi regime. The invasion prevented the possibility of Germany consolidating its hold on Europe and ultimately paved the way for the Allied victory.
Shaping the Post-War World and Historical Memory
The success of D-Day had a profound impact on the post-war world. It solidified the dominance of the Western Allied powers and laid the groundwork for the creation of new international institutions, most notably the United Nations, aimed at preventing future global conflicts. The liberation of Western Europe by democratic nations fostered a period of relative peace and prosperity in the region. Furthermore, D-Day has become an enduring symbol of Allied resolve, sacrifice, and eventual victory against tyranny. The historical memory of the invasion is preserved through memorials, museums, and countless personal narratives, serving as a constant reminder of the human cost of freedom and the importance of vigilance against oppression. The beaches of Normandy, once scenes of brutal combat, are now solemn places of remembrance, drawing visitors from around the globe who come to pay tribute to the courage and sacrifice of those who fought there. The lessons learned from Operation Overlord continue to inform military strategy and international relations, underscoring the enduring significance of this monumental undertaking. The courage and determination displayed by the Allied forces on that fateful day remain an inspiration, a testament to the indomitable spirit of those who fought for a better future.
A 3-Year Drought Hit the Hittite Empire. Did It Cause the Collapse?
FAQs
What was the historical raid detailed in the analysis?
The historical raid detailed in the analysis was the famous Battle of Hastings that took place in 1066 in England.
Who were the key figures involved in the historical raid?
The key figures involved in the historical raid were William the Conqueror, who led the Norman forces, and King Harold II, who led the Anglo-Saxon army.
What were the main reasons behind the historical raid?
The main reasons behind the historical raid were William the Conqueror’s claim to the English throne and King Harold II’s refusal to acknowledge William’s right to rule.
How did the historical raid impact the course of history?
The historical raid had a significant impact on the course of history as it led to the Norman conquest of England, changing the country’s language, culture, and political landscape.
What were some key strategies employed during the historical raid?
Some key strategies employed during the historical raid included the use of cavalry by the Normans, the positioning of archers on high ground, and the feigned retreat tactic used to lure the Anglo-Saxon forces into a vulnerable position.